

Table Of Contents
Washing Machine Drain Pipes
A drain pipe is essential for the operation of a washer since it facilitates the washer’s drainage system. However, even though washer drains are a significant part of the plumbing system, you must adhere to the plumbing codes. These regulations are enshrined under the International Residential Code, which aims to prevent fire accidents.
An essential part of this type of plumbing is the installation of a drain pipe and a standpipe to enable the drain hose connection. If your machine has not come with one, you can easily create one using a PVC pipe. It is necessary to know how to connect the drain pipe to the drain hose on your washing machine to ensure your machine drains water properly. In essence, your washing machine is one of your most used home appliances.
This article provides you with all the crucial information to install a drain pipe, a standpipe, and connect the drain pipe securely to the drain hose using the standpipe. Read on!
Let’s start with how to install a washing machine drain pipe.
Steps To Install A Washing Machine Drain Pipe
Step One: Measure the size of the Y-fitting
Measure the size of the Y-fitting using a measuring tape. Next, mark the length of the Y-fitting on the existing drain line. This activity requires a high level of accuracy.
If you take the wrong measurement and end up cutting a more extensive section of the drain line, you might end up with a bigger section on the Y-fitting. It is not easy to work with the wrong fittings.
Step Two: Gather safety equipment and tools
This second step requires a reciprocating saw, a utility knife, and safety glasses. Put on your PPE (Personal Protection Equipment) like safety glasses and cut the section you marked on the drain line using your reciprocating saw. To get a perfect fit for your Y-fitting, it is best to cut the drain line perpendicularly.
While you cut the drain line, it is highly likely for water to splash out; therefore, you should be prepared for it. Once you have cut the drain line, remove any sharp edges left on both the cutting edges using the utility knife.
Step Three: Clean the cut section of pipe
Now, using a clean piece of cloth, thoroughly clean the cut area on the drain line where you would be installing the Y-fitting. Ensure that the pipe is completely empty with no running water.
Similarly, it is best to keep the edges of the drain line dry. Wetness on the edges of the drain line affects the ability of the Y-fitting to stick, thus causing water leaks.
Step Four: Apply PVC glue to the outer edges
Once you are sure that the edges of the drain line are dry, apply a PVC glue coating on them. It is best to apply the glue inside the borders of the Y-fitting. Then, you need to attach the Y-fitting to the cutting edge and hold it on for a couple of minutes to allow it to stick. Remember, the third opening of your Y-fitting should be alongside the drain line and both facing towards the same direction.
The above process is always the first line of installing a washing machine drain pipe. You cannot install a drain pipe without installing the Y-fitting first. Once you have successfully installed the Y-fitting, you should have the drain line and the waste pipe fixed at the same level. However, after installing the Y-fitting, you need to test it by running some water to ensure there are no gas gaps.
It is best to do this immediately since such a mistake is easier to repair at first instance than at a later period. The following steps are also vital. They will guide you on installing the drain hose and standpipe of the washing machine onto the already installed Y-fitting.
Installing A Standpipe And Washing Machine Drain Hose
Step One: Fixing the 90-degree elbow
Using a piece of clean cloth, thoroughly clean the opening of the Y-fitting before applying the PVC glue on the inside edges. Then, put some PVC glue around the outer parts of the elbow before inserting it in the Y-fitting.
Turn the elbow gently to ensure that the remaining opening is facing the floor downwards. Hold it firmly for some time to allow the glue to take effect and dry thoroughly.
Step Two: Installing the PVC drain pipe
This is where you fix your long PVC drain pipe. At this point, there is nothing complicated that you need to do. You simply need to attach the long PVC drain pipe to the remaining opening of the elbow that erects vertically along the wall.
Also, it would be best to cover the edge of the pipe and the opening of the elbow by joining the Y-fitting and the elbow together using PVC glue. If you do this properly, you should be having the drain pipe standing vertically at 90 degrees with the drain line lying horizontally.
Step Three: Trimming the PVC drain pipe
Sometimes you might finish installing your drain pipe only to realise that it is too long. In this instance, you need not worry. You only need a reciprocating saw to mitigate this threat. You could use the reciprocating saw to cut the extra part of the pipe.
However, be very careful with the measurements since a too-short drain pipe cannot function effectively, thus causing drainage problems. It is always best to keep the top of the pipe higher than the washing machine’s water level (about 86 to 91 centimetres higher).
Step Four: Strapping the drain pipe
Now, you need to strap the washing machine drain pipe carefully. You need to use the straps having screws to fix the drain pipe on the wall. To best do this, insert the drain pipe into the straps and tighten them into the wall by using a hammer.
It would help to use at least five pipe straps, ensuring they are five inches away from each other. Similarly, avoid hammering the straps too high on the wall as this can destroy the pipes.
Step Five: Connecting the PVC drain pipe
The final step is connecting your drain pipe to the washing machine via the washer drain hose. The following are the steps to follow to connect a drain pipe to the washer drain hose:
- After installing the washer supply hoses, move the washer into the required space. Some washers have an already installed drain hose. However, you need to connect the supplied hose to the washing machine’s drain opening if you do not have it.
- Some washing machines have their water supply hoses located inside the machine. If this is the instance for your washing machine, you need to unplug the control panel’s connectors, then slide the cabinet in your direction to remove the water supply hose pipe. Once you have slid the cabinet, you need to let go of the clamp that holds the hose pipe to the pump to enable you to attach it.
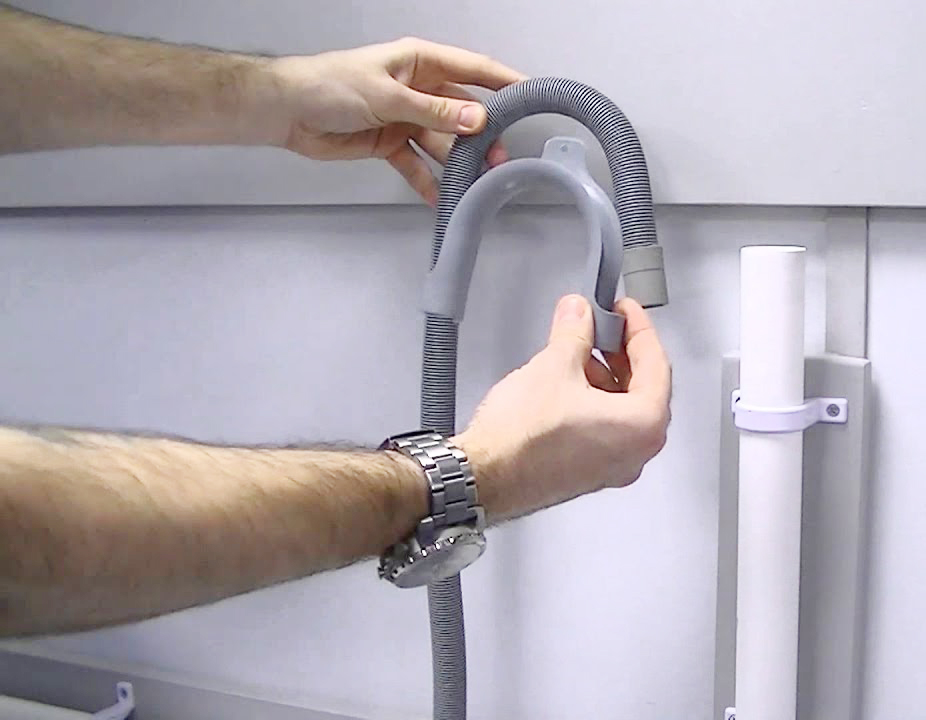
- Next, you need to attach the drain hose over the lip of the standpipe. It is recommended that you leave an air gap between the drain hose and the standpipe to avert water from siphoning out of the washer. Therefore, you should not seal the drain hose to the standpipe. Similarly, it is best not to lay the drain hose on the floor to facilitate faster draining water out of the washer.
- Remember to fasten back the drain hose with the pump using the clamp.
Finally, you have the installation of a washing machine drain pipe complete. However, just check to ensure that the washing machine drain pipe is standing vertically and connected to the drain line at an angle of 90 degrees by using an elbow. The top of your washing machine drain pipe should be connected to the washing machine via the washing machine’s drain hoses.
Once you have discovered that everything is in the right position, it is best to run some water to test if it works appropriately without any leaks. For better drainage of the washing machine, attach the drain hose to a standpipe secured on the wall framing instead of using a utility sink.
A standpipe is a 2-inch-long vertical drain pipe that is connected to a P-trap. The P-trap is then connected to the drain. How then can one install a standpipe drain?
Steps To Install A Standpipe Drain

Step One: Locate the drain
First, you need to find the drain near the washing machine. Once you locate it, cut through the pipe using a reciprocating saw or a hacksaw. Then, separate the two sides and sand the edges using 120-grit sandpaper. Next, you need to glue a wye fitting that has a 2-inch inlet using ABS cement. Ensure that the inlet faces up to the direction of the washing machine.
Step Two: Collect drain pipe
Collect a 2-inch drain pipe extending from the wye to the point of 12 inches off the floor and behind the washing machine. It would help to keep a slope of about a quarter-inch per foot.
Step Three: Apply glue
Glue a 20-inch ABS P-trap to the left opening of the drain. Using a strap with a clean-out plug, remove any obstructions that may prevent your process from going through. Ensure that the strap inlet faces upwards.
Step Four: Attach the pipe to the strap inlet
Using glue, attach a 2-inch ABS pipe to the strap inlet that extends to a region above the washing machine. This vertical pipe is your standpipe, and it would help to strap it to a stud.
Step Five: Add a vent
If you do not already have a vent, consider adding one. Fixing a vent would help cut the drain pipe at a region less than five feet from the trap. Then glue a 2-inch sanitary tee, ensuring that its inlet is facing upwards while the sweep points towards the direction of the washer.
Step Six: Fix a sanitary tee
Finally, get a 2-inch vent that extends towards the already existing vent. Now, cut the existing vent and fix a sanitary tee. Then, glue the new vent to the inlet of the tee. Keep the new vent at a slight slope towards the tie-in region at a quarter-inch per foot.
Once you properly do all these, you can rest assured of effective washing machine drainage.
Do It Yourself Or Hire A Professional?
All of the above installations are simple activities that you can do by yourself. Similarly, you do not need to hire a professional plumber to help you with this simple plumbing. This will help you save on extra expenses and enable you to work out your plumbing at your own pace and pleasure.
However, do not hesitate to call your plumber if you do not have enough time or lack the adequate confidence required to carry out these installations. It is better to have a professional plumber fix the drain pipe for you than rush over it and cause severe damages that will cost you a lot of money.


-p-500.webp)